How To: Instant Visitor Emailing
Configuring the Visitor Email Feature. Overview. First Glance can instantly send a personalized email to a visitor when their badge is scanned. The email is sent to the address the visitor used when…

Updated
by Matt Ridge
Configuring the Visitor Email Feature
Overview
First Glance can instantly send a personalized email to a visitor when their badge is scanned.
The email is sent to the address the visitor used when registering for the event.
Configuration
- Login to app.zentrest.com
- Click your company name at the top, right
- Click Events
- Click the event for which you would like to use the instant email feature
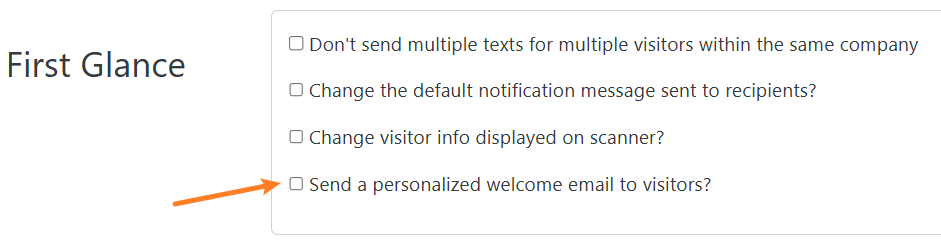
- Locate the First Glance section
- Tick the Send a personalized welcome email to visitors? box
- Enter an Email Subject
- Enter an Email Body, similarly to how you would compose a regular email.
- Use the Email Body toolbar to format your message, add images, etc.

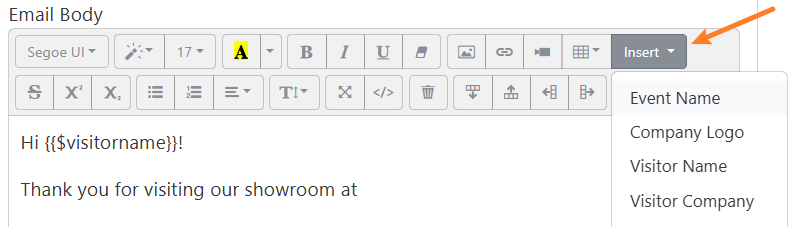
Personalize with Smart Tags
You can insert smart tags which will be replaced with actual values, such as the visitor's name, when the email is sent.
The available smart tags are:
- Event Name
- Company Logo
- Visitor Name
- Visitor Company
- Visitor Job Title
- Visitor Email
- Visitor Phone
- Visitor Address
- Visitor Address 2
- Visitor City
- Visitor State
- Visitor Zip
- Visitor Country
Using Smart Tags
- Position your cursor in the Email Body where you would like the smart tag
- Click the Insert drop-down in the Email Body's toolbar and choose one of the smart tags, ex.
Visitor Name - You'll notice a special tag surrounded by curly brackets, ex.
{{$visitorname}} - Do not make any changes to the brackets or the characters between the brackets.
How did we do?
How To: Recipients Not Receiving Notifications
How To: Territory Zip Code Mapping